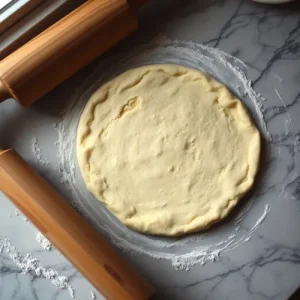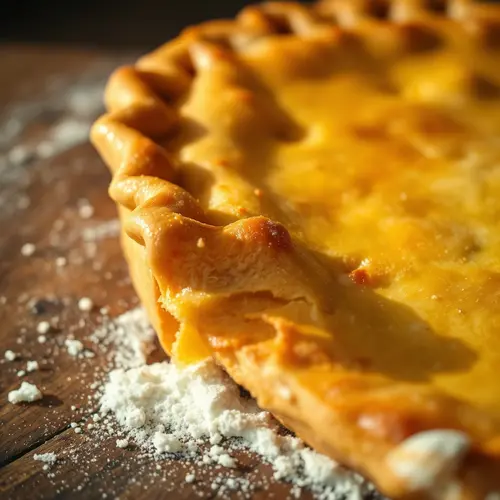
food processor pie crust with butter
Making a food processor pie crust with butter transforms a traditionally intimidating baking task into a simple, foolproof process that delivers consistently flaky, tender results in under 10 minutes. The food processor eliminates the guesswork of manual cutting, creating uniform butter particles that yield superior texture without overworking the dough.
Professional pastry chefs have long relied on mechanical methods for pie dough preparation. The key advantage lies in speed and temperature control—two critical factors that prevent gluten overdevelopment and butter melting.
Why Food Processor Pie Crust with Butter Outperforms Hand Methods
The science behind flaky pastry centers on fat distribution. When you pulse cold butter into flour using a food processor, you create distinct layers of fat-coated flour particles. These layers separate during baking as water evaporates and butter melts, creating the characteristic flakiness.
Hand methods risk warming the butter through prolonged contact with warm hands. According to culinary institutes specializing in pastry arts, maintaining butter temperature below 65°F throughout mixing proves essential for optimal texture.
The food processor achieves this in seconds rather than minutes. Each pulse breaks butter into pea-sized pieces without generating heat from friction or body warmth.
Essential Ingredients and Ratios for Success
A reliable food processor pie crust with butter requires precise ingredient ratios. Professional bakers follow the 3-2-1 ratio as a foundation: three parts flour, two parts butter, one part liquid by weight.
| Ingredient | Standard Single Crust | Function |
|---|---|---|
| All-purpose flour | 1¼ cups (156g) | Structure and body |
| Unsalted butter, cold | ½ cup (113g) | Flakiness and flavor |
| Ice water | 3-4 tablespoons | Binds dough without activating gluten |
| Salt | ½ teaspoon | Flavor enhancement |
| Sugar (optional) | 1 tablespoon | Browning and subtle sweetness |
European-style butter with higher fat content (82-84%) produces richer flavor and superior flakiness compared to standard American butter at 80% fat. The reduced water content means less gluten activation and more tender results.
Step-by-Step Food Processor Pie Crust with Butter Technique
Proper technique separates amateur results from professional quality. Follow this exact sequence for guaranteed success.
- Prep the butter: Cut cold butter into ½-inch cubes and return to refrigerator for 10 minutes. Freeze flour and food processor blade for 15 minutes before starting.
- Combine dry ingredients: Pulse flour, salt, and sugar (if using) 3-4 times to aerate and distribute evenly.
- Cut in butter: Add butter cubes and pulse 12-15 times in 1-second bursts until mixture resembles coarse cornmeal with some pea-sized butter pieces remaining.
- Add liquid gradually: Drizzle ice water through feed tube while pulsing 8-10 times. Stop when dough just begins to clump but still looks shaggy.
- Test readiness: Pinch a small amount—if it holds together, you’re done. If it crumbles, add water one teaspoon at a time.
- Rest the dough: Turn out onto plastic wrap, press into a disk, and refrigerate minimum 30 minutes before rolling.
Common Mistakes That Sabotage Your Crust
Even experienced bakers make critical errors when preparing food processor pie crust with butter. The most damaging mistake involves overprocessing—continuing to pulse after the dough forms cohesive clumps.
Overprocessed dough develops excessive gluten, resulting in tough, chewy crust instead of tender flakes. The dough should look rough and barely hold together when you stop pulsing. It will come together fully during the resting period.
Another widespread error involves using room-temperature butter or water. Temperature control isn’t optional—it’s fundamental chemistry. Warm butter incorporates into flour rather than remaining in distinct pieces, eliminating the layered structure that creates flakiness.
Troubleshooting Texture Problems
If your food processor pie crust with butter turns out tough or dense, analyze what went wrong. Tough crust indicates gluten overdevelopment from too much liquid, excessive mixing, or insufficient fat. Dense, crumbly crust suggests inadequate hydration or butter pieces that were too small.
Professional remedy: For tough dough, there’s no fix after baking. Prevention requires vigilant pulse control and minimal water. For crumbly dough, add ice water in quarter-teaspoon increments and pulse briefly between additions.
Advanced Techniques from Pastry Professionals
High-end pastry kitchens employ several refinements that home bakers can replicate. Vodka substitution for half the water content leverages alcohol’s lower gluten-activation properties while still providing necessary moisture. The alcohol evaporates during baking, leaving zero flavor impact.
Laminating food processor dough—rolling, folding, and re-chilling—creates additional layers similar to puff pastry. After initial mixing, roll dough into a rectangle, fold into thirds like a letter, rotate 90 degrees, and repeat twice more with 20-minute chills between folds.
This hybrid approach bridges the gap between standard pie dough and laminated pastry, delivering extraordinary flakiness while maintaining the simplicity of food processor pie crust with butter preparation.
Flavor Variations and Adaptations
The neutral base accommodates countless modifications. For savory applications like quiche or pot pie, increase salt to ¾ teaspoon and add freshly ground black pepper or herbs. Sweet variations benefit from vanilla extract, citrus zest, or spices like cinnamon and cardamom mixed with the dry ingredients.
Whole wheat flour can replace up to 30% of all-purpose flour for nutty flavor and increased nutrition. Beyond this ratio, the bran particles cut gluten strands excessively, compromising structure.
Storage and Make-Ahead Strategies
Prepared food processor pie crust with butter freezes exceptionally well, offering significant time-saving advantages. Wrap dough disks tightly in plastic wrap, then aluminum foil, and freeze up to three months.
Thaw frozen dough overnight in the refrigerator rather than at room temperature. Gradual thawing prevents condensation that can make dough sticky and difficult to roll. Par-baked shells freeze equally well and can go directly from freezer to oven when needed.
Expert Opinion: The Butter vs. Shortening Debate
The pastry world remains divided on fat choice. All-butter crusts deliver superior flavor and browning but can be temperamental. Shortening produces reliably flaky results due to its higher melting point but lacks flavor complexity.
After extensive testing in professional kitchens, the optimal solution combines both: 75% butter for flavor and browning, 25% shortening for insurance against temperature fluctuations. This hybrid approach delivers foolproof flakiness with minimal compromise on taste—a practical solution for home bakers working in variable kitchen conditions.
The food processor pie crust with butter method democratizes professional pastry techniques, removing barriers between ambitious home bakers and bakery-quality results. Master these fundamentals, and pie-making transforms from stressful challenge to reliable pleasure.